
【ML笔记】MacOS下的pytorch环境配置
MacOS安装pytorch
1.新建conda环境
conda create -n torch python=3.9 |
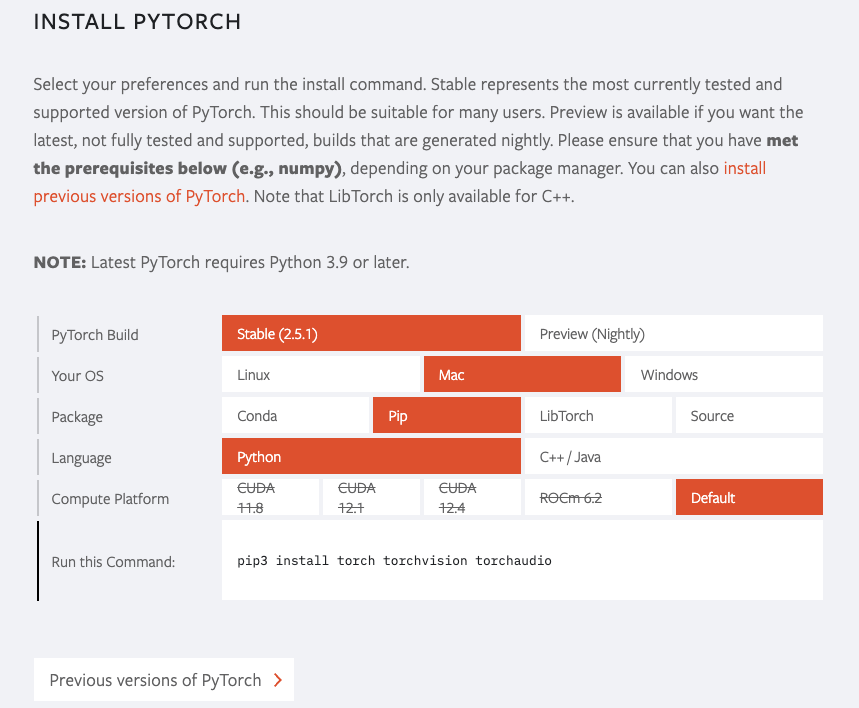
2.用pip命令安装torch
命令详见Pytorch官网指导页面
pip3 install torch torchvision torchaudio |
3.环境测试代码
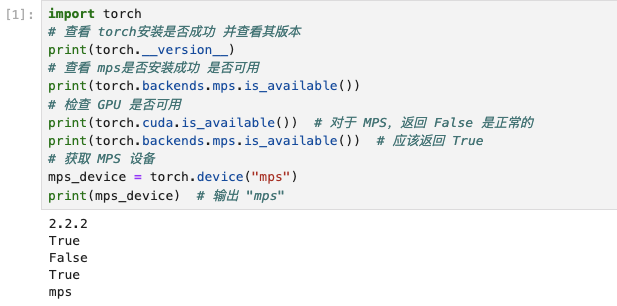
3.1.测试代码-1
import torch |
import torch |
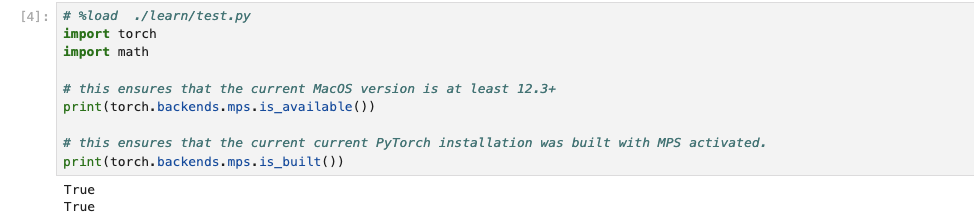
3.2.测试代码-2
import torch |
 )
)
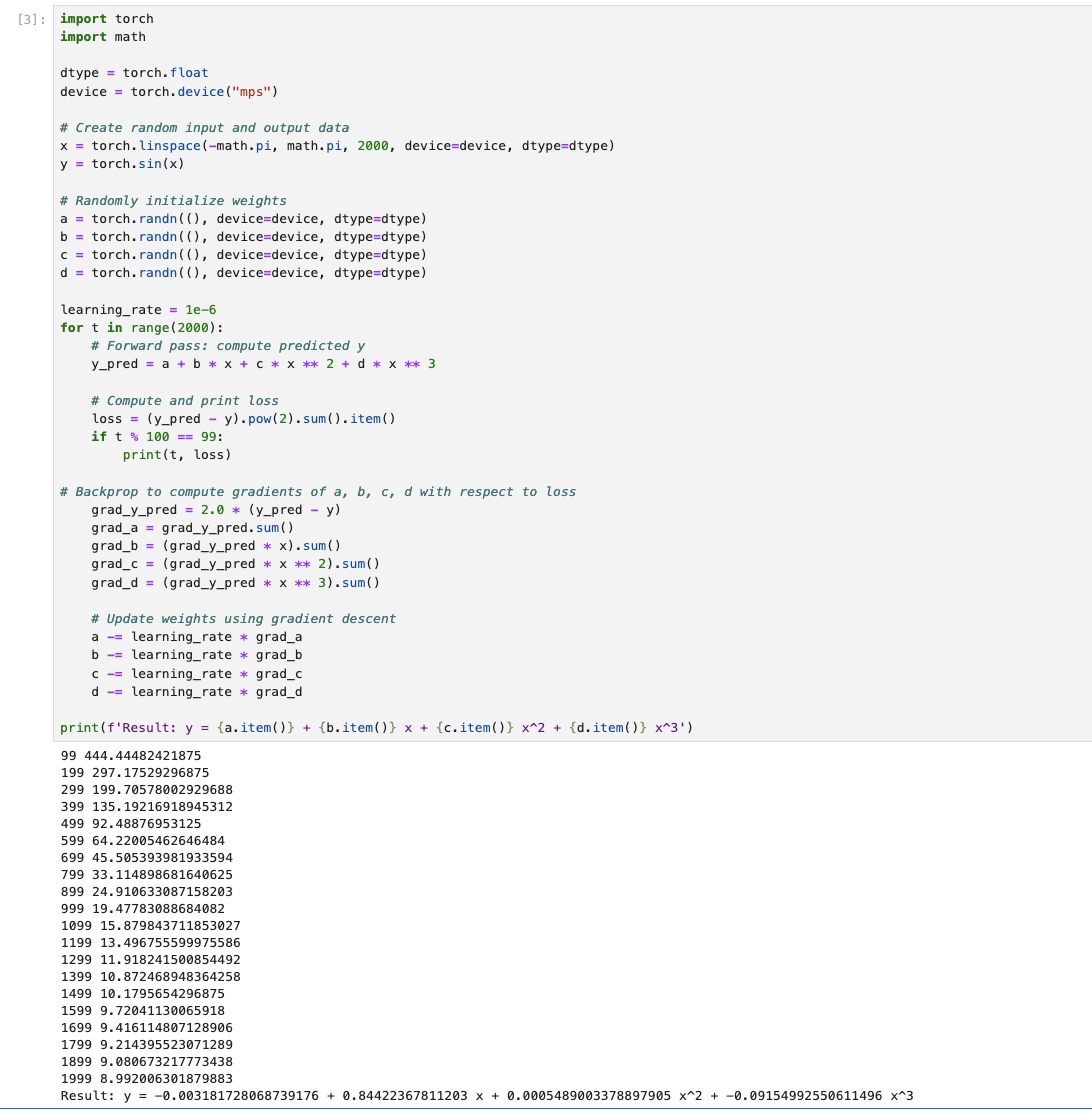
3.3.在Mac M1中指定使用GPU加速
To run PyTorch code on the GPU, use torch.device(“mps”) analogous to torch.device(“cuda”) on an Nvidia GPU. Hence, in this example, we move all computations to the GPU:
要在 Mac M2的GPU 上运行 PyTorch 代码,使用命令 torch.device(“mps”)来指定。这类似于 Nvidia GPU 上的torch.device(“cuda”)命令。具体使用方法见下方代码:
import torch |
关于Jupyter Notebook
推荐博客:https://blog.csdn.net/cainiao_python/article/details/125567913
把pip升级到最新版本
pip install --upgrade pip |
- 注意:老版本的pip在安装Jupyter Notebook过程中或面临依赖项无法同步安装的问题。因此**「强烈建议」**先把pip升级到最新版本。
安装Jupyter Notebook
pip install jupyter |
汉化
pip install jupyterlab-language-pack-zh-CN |
启动
① 默认端口启动
jupyter notebook |
② 指定端口启动
jupyter notebook --port <port_number> |
③ 启动服务器但不打开浏览器
jupyter notebook --no-browser |
.py文件和.ipynb文件如何进行相互转换
1. 如图所示将.ipynb文件转换为.py文件
法一:在xxx.ipynb所在目录下,到导航栏(资源管理器输入和修改当前路径的地方)直接输入命令(或打开终端/cmd输入):
jupyter nbconvert --to script xxx.ipynb |
其中xxx.ipynb是要转换文件的名字,转换后在该目录下出现xxx.py文件(有的版本是xxx.txt文件,再改下后缀即可)。
法二:在Jupyter notebook或Google Colab中打开ipynb文件,然后选择file–download as–python file
2.将.py文件转换为.ipynb文件
%run xxx.py加载了xxx.py文件,相当于导包
%load xxx.py把xxx.py的代码显示出来
- 首先将需要进行转换的
py文件放在jupyter Notebook工作目录中; - 然后在
jupyter Notebook中新建一个.ipynb文件; - 在新建立的文件中输入
%load xxxx.py - 然后就可以在
juypyter Notebook中以ipynb的格式打开xxxx.py文件了;
例如,
%load ./learn/test.py |
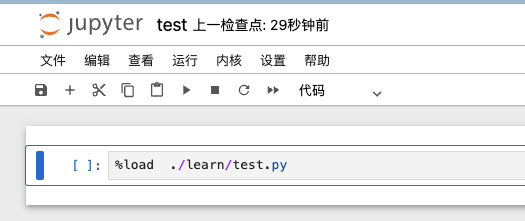
点击运行,如下图所示:

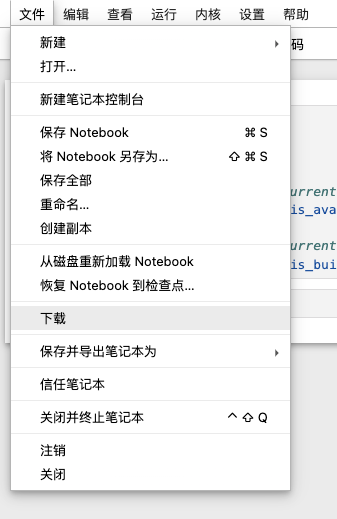
然后点击“文件”、通过“下载”将其保存为“ipynb的格式”的文件;同时工作目录下也会生成一个ipynb的文件。
Accelerated PyTorch training on Mac
参考博客:
https://blog.csdn.net/weixin_71894495/article/details/144629831
https://www.xn--vjq503a.fun/ml-note/pytorch-mps/
https://cloud.tencent.com/developer/article/2221944MPS(Metal Performance Shaders)
PyTorch在加载设备的时候一般会有这样的语句(NVIDIA的CUDA)
if torch.cuda.is_available(): |
只要在中间插入MPS设备就好了:
if torch.cuda.is_available(): |
执行如上代码,能够成功打印出torch版本,证明torch安装成功;如果能打印出True证明MPS可用,至于其中的一个False是cuda是否可用,因为MacOS没有安装显卡所以并无法安装cuda加速,固然为false。
加速对比
总的来说,模型越复杂,其MPS加速越明显,如果模型太简单,只需要几秒钟就能跑完的话,MPS加速反而不如CPU,因为MPS要有一些准备工作,把数据放入图显核心里去,如果算法太简单或者数据量太少,结果运行加速节约的时间还不如数据准备的时间长,看起来就会觉得MPS反而需要更多时间来运行。
测试机配置为:Macbook Air M2(8核CPU+10核图形处理器)16G+512GB
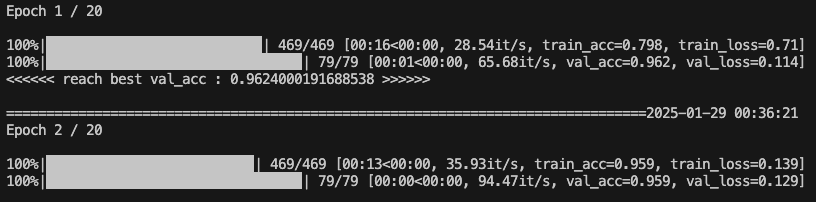
使用如下测试代码,以mnist手写数字识别为例,演示使用mac M2芯片GPU的mps后端来加速pytorch的完整流程。
核心操作非常简单,和使用cuda类似,训练前把模型和数据都移动到torch.device(“mps”)就可以了。
import torch |
在使用MPS运行时,CPU占比下降到较低水平,开始启用GPU运行,10核心的图显也仅仅使用了1颗,感觉加速不是特别明显;

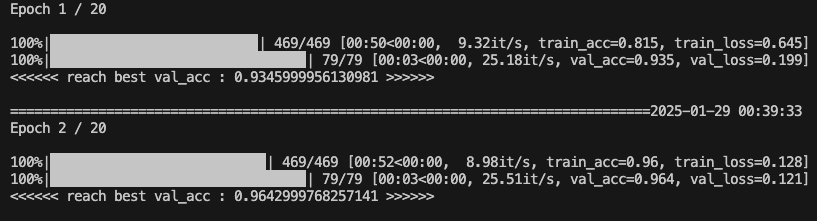
在使用CPU运行时, 明显看到8核心的CPU,程序几乎占用了7个核心,GPU没有使用,

总结
Mac的GPU性能还是可以的,用来跑边端模型和训练微小模型还是很不错的,因此比较适合初学者。